How to Bulk Upload and Schedule to Buffer Using Bulk Buffer

If you want to make managing your social media profiles even easier, bulk uploading your pre-prepared status updates to Buffer is easier than you think with Bulk Buffer.
Bulk Uploading to Buffer: A Use-Case Example
Here at CampaignSpike, we run a range of curated emails that offer a list of useful, topical content to subscribers. In those newsletters, we also include a short excerpt to act as an enticing lede to introduce the content. Excerpts like these can make for excellent social media post descriptions, so we often repurpose the most relevant of them for social profiles, too.
To save time on the process of scheduling these posts, we simply bulk upload them to Buffer (our favorite social scheduling tool), using Bulk Buffer. This is quick, easy, and reliable.
Below, we’ll quickly show you exactly how to do this, so you can also incorporate this process into your own workflow.
Please note: as of writing, you cannot use Bulk Buffer to upload to Instagram or Pinterest.
Prepare Your Social Media Posts
First, prepare your social media posts in a simple spreadsheet. The left-most column should be your post description, and the right column should include your link, along with any UTM parameters you wish to include. The example below is for a curated news source we manage for our local city. This was prepared in Google Sheets.
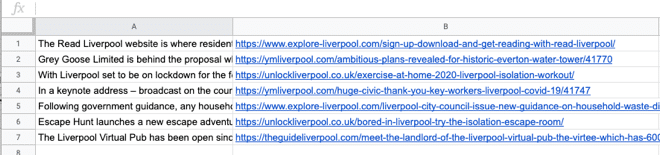
If you’re going to be posting any of these updates to Twitter, make sure your posts are short enough to fit within Twitter’s 280 character limit (a link will take up 23 of those characters once it is shortened by Twitter).
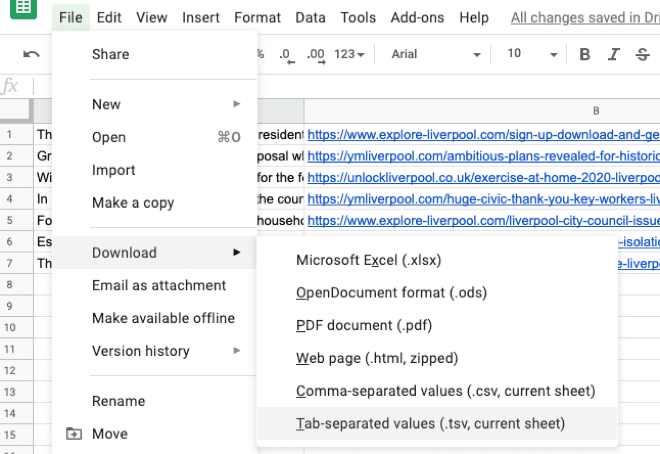
Download as a TSV File
Download your prepared posts as a TSV file. In Google Drive click File > Download > TSV
Sign In to Bulk Buffer
Head Over to Bulk Buffer, click Start Uploading, then select to allow Bulk Buffer access to your Buffer account. This works even if you’re only on the free Buffer plan (though your plan limitations will still be in place).
Upload Your TSV File
Drag your TSV file onto the relevant box in Bulk Buffer. Your prepared social media posts will be listed on the page. This is your chance to make any last-minute edits.
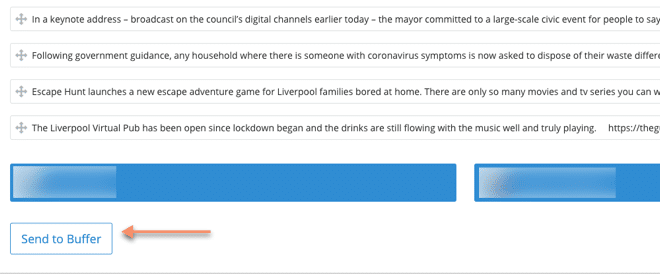
Schedule The Posts
Select which profile(s) you would like to schedule the posts to (they will turn blue when selected), then click Send to Buffer. You’ll see the posts gradually being sent into your Buffer queue.
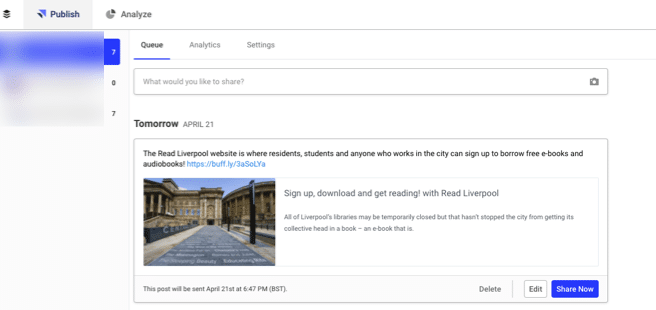
Check your Buffer Queue
Finally, head over to Buffer, and double check the posts have been scheduled correctly. You can edit these posts within Buffer, as you would with normal posts.
And there you have it: how to bulk upload and schedule social media posts to Buffer, using Bulk Buffer. We hope this will save you some valuable time so you can put even more focus into driving your business forward.
How Much Time Could You Save?
Using Bulk Buffer to automatically schedule posts in your Buffer queue might actually save you more time than you think. For example:
- If you usually spend 10 minutes per day scheduling to Buffer, Bulk Buffer could save you 3 hours 20 minutes every 4 weeks, or almost two full days per year.
- If you usually spend 30 minutes per day scheduling to Buffer, Bulk Buffer could save you 10 hours every 4 weeks, or almost five and a half full days per year.
Considering Bulk Buffer is a free tool, that’s one hell of a time-saving!